


Everest Base Camp Trek Itinerary – Classic & Alternative Routes
Introduction: Multiple Paths to the Roof of the World Everest Base Camp (EBC) isn’t reached by a single trail; there are multiple trekking routes, each offering a unique adventure. From the classic Lukla flight to the historic Jiri Trail, the scenic Gokyo Lakes detour, or the challenging Three Passes trek, every path has its own […]
-
 Bold Himalaya
-
16 November, 2025
-
39 mins read
-
399 Views
-
0 Comments
Introduction: Multiple Paths to the Roof of the World
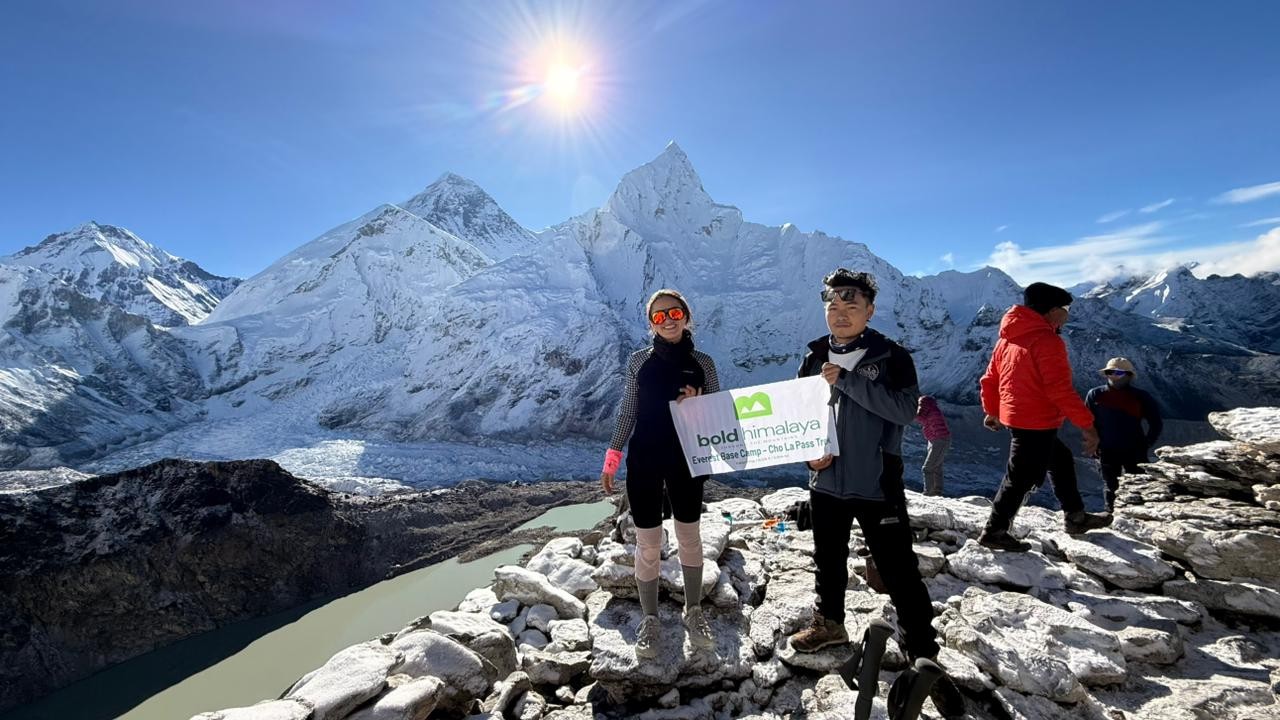
Everest Base Camp (EBC) isn’t reached by a single trail; there are multiple trekking routes, each offering a unique adventure. From the classic Lukla flight to the historic Jiri Trail, the scenic Gokyo Lakes detour, or the challenging Three Passes trek, every path has its own story, culture, and breathtaking Himalayan views.
Choosing the right route depends on your available days, fitness level, and desire for either solitude, cultural immersion, or a fast-paced adventure. This guide will help you navigate all the Everest Base Camp trek routes and plan the perfect itinerary for your journey to the roof of the world.
Factors That Shape Your Choice
Route selection depends on several key factors:
- Time available: 10 days minimum for the quick Lukla route, up to 21 days for the traditional approaches
- Fitness level: Moderate fitness works for classic routes; excellent conditioning is needed for pass crossings
- Acclimatization preference: Gradual altitude gain via Jiri, or rapid elevation via Lukla flight
- Cultural immersion: Lower elevation routes offer deeper village experiences
- Budget considerations: Flights cost more but save time, and road approaches reduce expenses
- Adventure appetite: Standard trails vs. high passes and peak climbs
This guide covers:
- Classic Lukla route
- Traditional overland approaches (Jiri, Phaplu)
- Road-accessible options
- Side treks (Gokyo Lakes)
- Three-pass variations
- Optional peak climbs
- Helicopter alternatives
Understanding these options matters because the approach shapes everything—the pace of acclimatization, the depth of cultural immersion, the quality of solitude or lack thereof. Even the likelihood of actually reaching Base Camp depends partly on which route gets chosen and why
The Classic Everest Base Camp Trek: 14-Day Lukla Itinerary
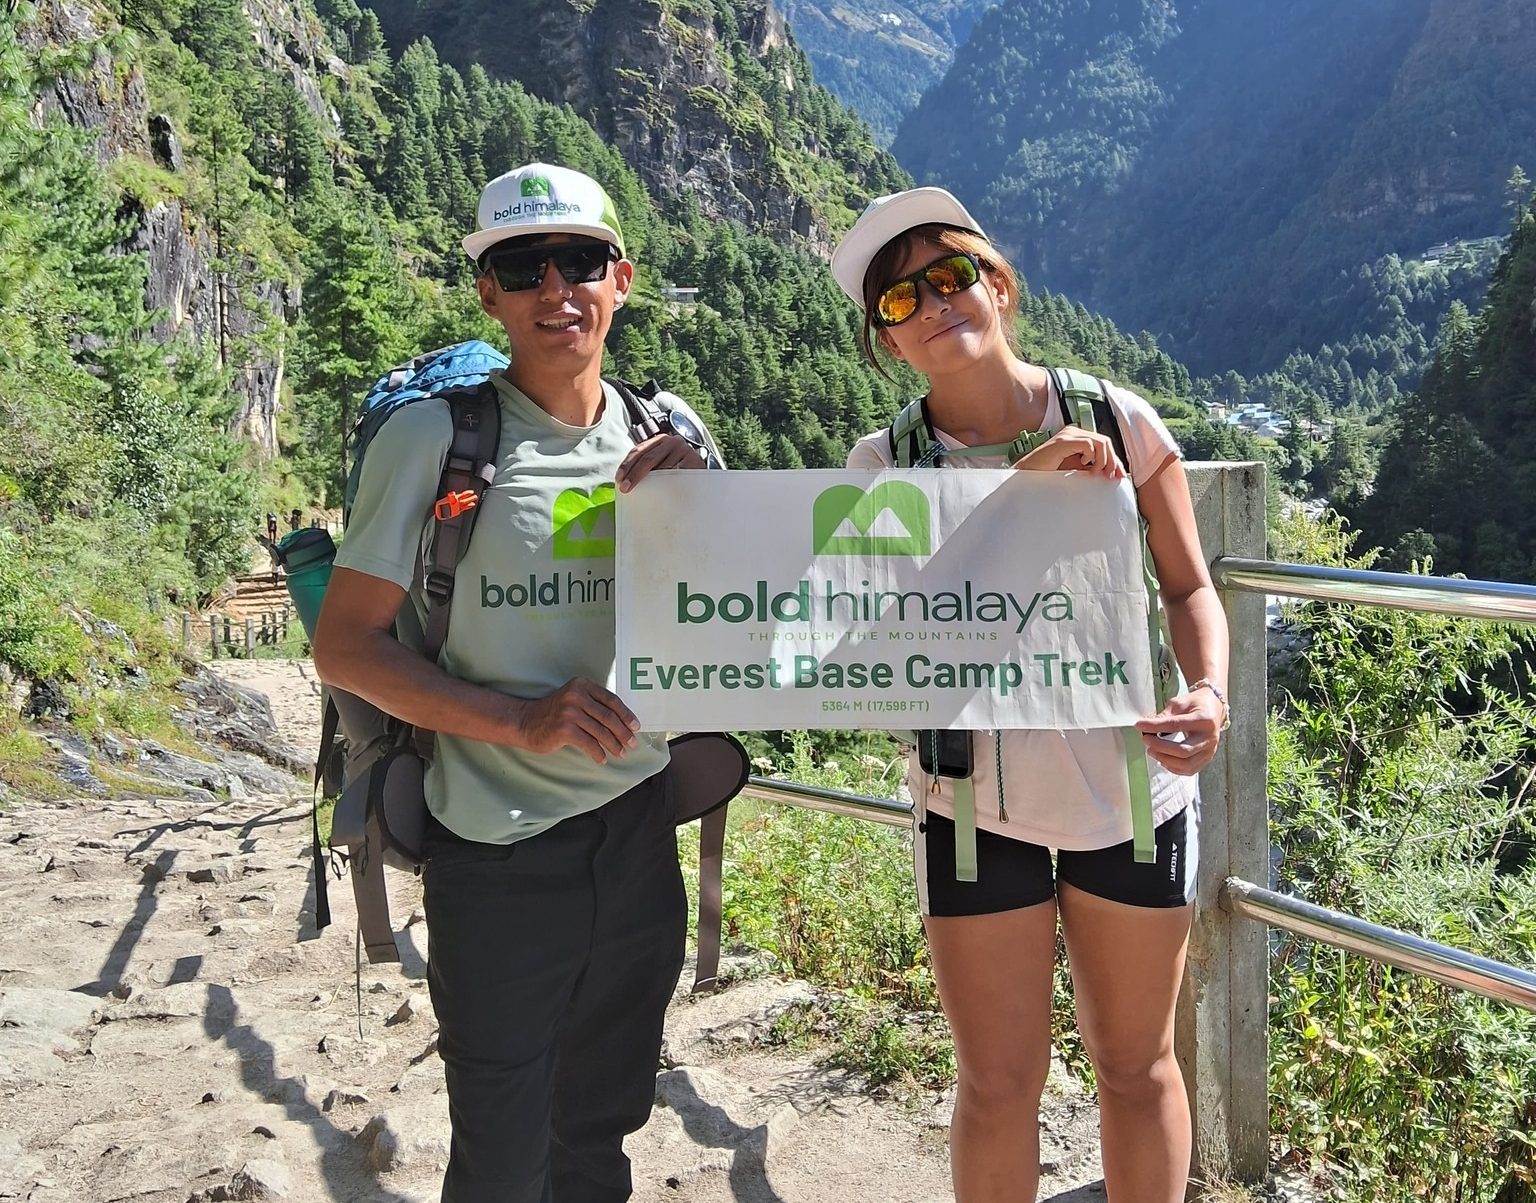
This is the famous Everest Base Camp Trek Itinerary, the one appearing in guidebooks and Instagram feeds. The route's popularity stems from accessibility rather than ease. Lukla airport provides direct entry to Khumbu. Villages appear every few hours, offering lodges and meals. The trail itself has been worn smooth by decades of boots.
That doesn't make it gentle. Elevation gain happens relentlessly. Bodies complain in languages previously unknown.
Why Trek to Everest Base Camp?
People undertake this trek to test their limits, immerse themselves in Sherpa culture, and witness the surreal scale of the Himalayas. The sense of accomplishment after two weeks of sustained effort is transformative.
Reasons people make this journey:
- Testing personal limits against extreme environments
- Walking where most humans never go in landscapes that don't exist elsewhere
- Cultural immersion in living Sherpa Buddhist communities
- The earned quality of sustained effort over two weeks
- That moment on Kala Patthar when Everest emerges from darkness at sunrise
The trek combines physical challenge with spiritual geography and natural beauty at a scale that changes how people understand both mountains and themselves.
Day-by-Day Breakdown of the Classic EBC Trek
Day 1: Arrival in Kathmandu (1,400m)
Kathmandu arrival begins the journey. The city's chaos becomes the baseline against which mountain silence will later contrast.
Activities:
- Permit acquisition and verification
- Final gear checks in Thamel district shops
- Pre-trek briefing with the guide company
- Rest and preparation for an early morning flight
Prayer flags flutter between buildings. The same flags that will mark every pass and summit ahead.
Day 2: Fly to Lukla (2,860m), Trek to Phakding (2,610m)
Flight duration: 35 minutes
Trekking time: 3–4 hours
Difficulty: Easy descent and gentle walking
The Flight That Changed Everything
Tenzing-Hillary Airport in Lukla operates from a runway tilted at twelve degrees. It's 527 meters long, ending at a stone wall. There's no go-around option. Small twin-prop planes hold maybe fifteen passengers plus minimal cargo.
Weather dictates everything. Flights are constantly delayed due to wind, clouds, or visibility issues. Trekkers might spend three days in Kathmandu waiting for a clear window or get stuck in Lukla for a week trying to return.
The flight itself threads through valleys barely wider than the plane's wingspan. Then that dramatic banking approach, the tilted runway rushing up, wheels slamming down, brakes screaming, and suddenly arrival happens at 2,860 meters, having skipped every intermediate elevation.
Trek to Phakding
The first day descends slightly to Phakding, following the Dudh Kosi river through pine forests. It's deliberately easy—allowing bodies to adjust while testing boots and pack weight.
What to expect:
- Suspension bridges swaying over white water
- First glimpses of prayer wheels and mani stones
- Stone villages with traditional architecture
- Basic lodges: bed, blanket, shared bathroom, wood stove
Dal bhat for dinner. The rhythm establishes itself immediately.
Day 3: Phakding → Namche Bazaar (3,440m)
Trekking time: 6 hours
Elevation gain: 800 vertical meters
Difficulty: Moderate to challenging
This day brings the first serious test. The climb is relentlessly uphill. Not technical. Just steep. Endlessly steep.
The Ascent
The suspension bridge, before the final ascent, sways above churning glacial water. Then the trail turns straight up through switchbacks that never seem to end.
Namche appears suddenly—a natural amphitheater of stone buildings clinging to impossible slopes. The town serves as Khumbu's commercial heart with bakeries, gear shops, Irish pubs, and better internet than most Kathmandu neighborhoods.
This is where entering Sagarmatha National Park becomes official. Sagarmatha, "forehead touching sky," is Everest's Nepali name. The park protects 1,148 square kilometers of high-altitude terrain. Guards check permits. Keep them accessible.
Day 4: Namche Bazaar – Acclimatization Day
Optional hike: Everest View Hotel (3,962m)
Activity level: Light hiking, exploration
The 2 PM Rule and Why It Matters
Namche demands respect. Most itineraries include a full acclimatization day here. The concept sounds lazy until attempting to climb stairs, and the heart pounds like after sprinting uphill.
The 2 PM rule governs everything above Namche:
Arrive at your destination by 2 PM. Always.
This gives the afternoon and evening for bodies to adjust before sleeping at the new elevation. Violate this, and altitude sickness comes calling. Stories circulate every season about trekkers who ignored advice, pushed through to Tengboche without stopping, collapsed with cerebral edema symptoms by midnight, and got helicoptered out the next morning.

Climb High, Sleep Low
Acclimatization days follow a proven pattern:
- Morning: Hike to the Everest View Hotel at 3,962 meters or toward Khumjung village
- Midday: Spend a few hours at a higher elevation, feeling progressively more breathless
- Afternoon: Return to Namche to sleep at a lower elevation
This helps bodies produce more red blood cells and adjust to thinner air. It's not optional. It's a survival strategy refined over decades of altitude experience.
The air at 3,440 meters holds about sixty-five percent of the oxygen available at sea level. Body's notice.
Day 5: Namche → Tengboche (3,867m)
Trekking time: 5–6 hours
Elevation gain: 427 meters
Difficulty: Moderate
Through Living Spiritual Geography
The trail gains and loses elevation constantly in that particularly exhausting Himalayan way:
- Descend to the Dudh Kosi River
- Cross on a high suspension bridge where prayer flags stretch over churning white water
- Climb steeply through the rhododendron forest
Tengboche Monastery
Tengboche sits at 3,867 meters, commanding views that stop conversations mid-sentence. This is where Sherpa culture becomes tangible rather than abstract.

What makes Tengboche special:
- Monastery dates to 1916 (rebuilt after 1989 fire)
- Traditional Tibetan Buddhist architecture was maintained
- Morning and evening puja ceremonies with deep-throated chanting
- Ama Dablam dominates the southern horizon with perfect symmetry
- Everest peeks over the Nuptse-Lhotse ridge to the north
Evening puja sometimes allows visitors. The devotion isn't performance—it's a continuation of practice stretching back centuries.
The overnight at Tengboche often marks when altitude begins affecting everyone. Headaches become common. Appetites shrink. Sleep quality deteriorates. That acclimatization day in Namche starts making perfect sense retroactively.
Day 6: Tengboche → Dingboche (4,410m)
Trekking time: 5 hours
Elevation gain: 543 meters
Difficulty: Moderate
The trail continues through increasingly sparse vegetation. Views expand as the valley opens. Stone walls separate ancient fields where hardy barley once grew.
Dingboche sits in a wide valley with massive peaks surrounding it. The landscape begins its transformation—trees disappear, vegetation thins to scattered grasses and lichen. Rock and ice start dominating.
Day 7: Dingboche – Acclimatization Day
Optional hike: Nangkartshang Peak (5,083m)
Another critical rest day following the same pattern: climb high, sleep low.
Acclimatization options:
- Nangkartshang Peak: Steep climb offering spectacular panoramic views
- Ridge behind town: Gentler option with excellent valley perspectives
- Village exploration: Rest day for those struggling with altitude
The air feels noticeably thinner now. Walking pace slows involuntarily. What took five minutes at sea level now requires fifteen with rest breaks.
Day 8: Dingboche → Lobuche (4,940m)
Trekking time: 5 hours
Elevation gain: 530 meters
Difficulty: Challenging
Above Dingboche, the world reduces to essentials. Rock. Ice. Thin air. Prayer flags.
The trail passes memorials to climbers who died on Everest—stone cairns with plaques marking lives lost in pursuit of summits. It's a sobering reminder of mountain dangers.

Lobuche: Last Real Lodging
Lobuche provides the last real lodging before Gorak Shep. The word "real" does heavy lifting here:
- Rooms are unheated
- Toilets are outside
- Water comes from melted ice
- Food options are limited to dal bhat, noodle soup, and fried potatoes
None of this matters. Bodies are too exhausted to care and too altitude-affected to complain properly.
Day 9: Lobuche → Gorak Shep (5,164m) → Everest Base Camp (5,364m) → Gorak Shep
Trekking time: 7–8 hours total
Highest point: 5,364m
Difficulty: Very challenging
The Final Push
The walk from Lobuche to Gorak Shep crosses terminal moraine—loose rock piled by glaciers. It's exhausting:
- Unstable footing on every step
- Constant ups and downs
- Altitude makes everything harder
- Every step feels like three
Gorak Shep
Gorak Shep at 5,164 meters serves as a base for the final approach. The village consists of a handful of lodges perched on a frozen lakebed. It's the highest permanent settlement on the trek.
Drop off packs at the lodge. Eat something despite having no appetite. Then head toward Base Camp.
How Many Steps Is Everest Base Camp?
Nobody actually counts. The walk from Gorak Shep takes three to four hours, depending on fitness and acclimatization. The trail follows the lateral moraine beside the Khumbu Glacier.
Base Camp Reality
Base Camp itself at 5,364 meters proves anticlimactic for many trekkers:
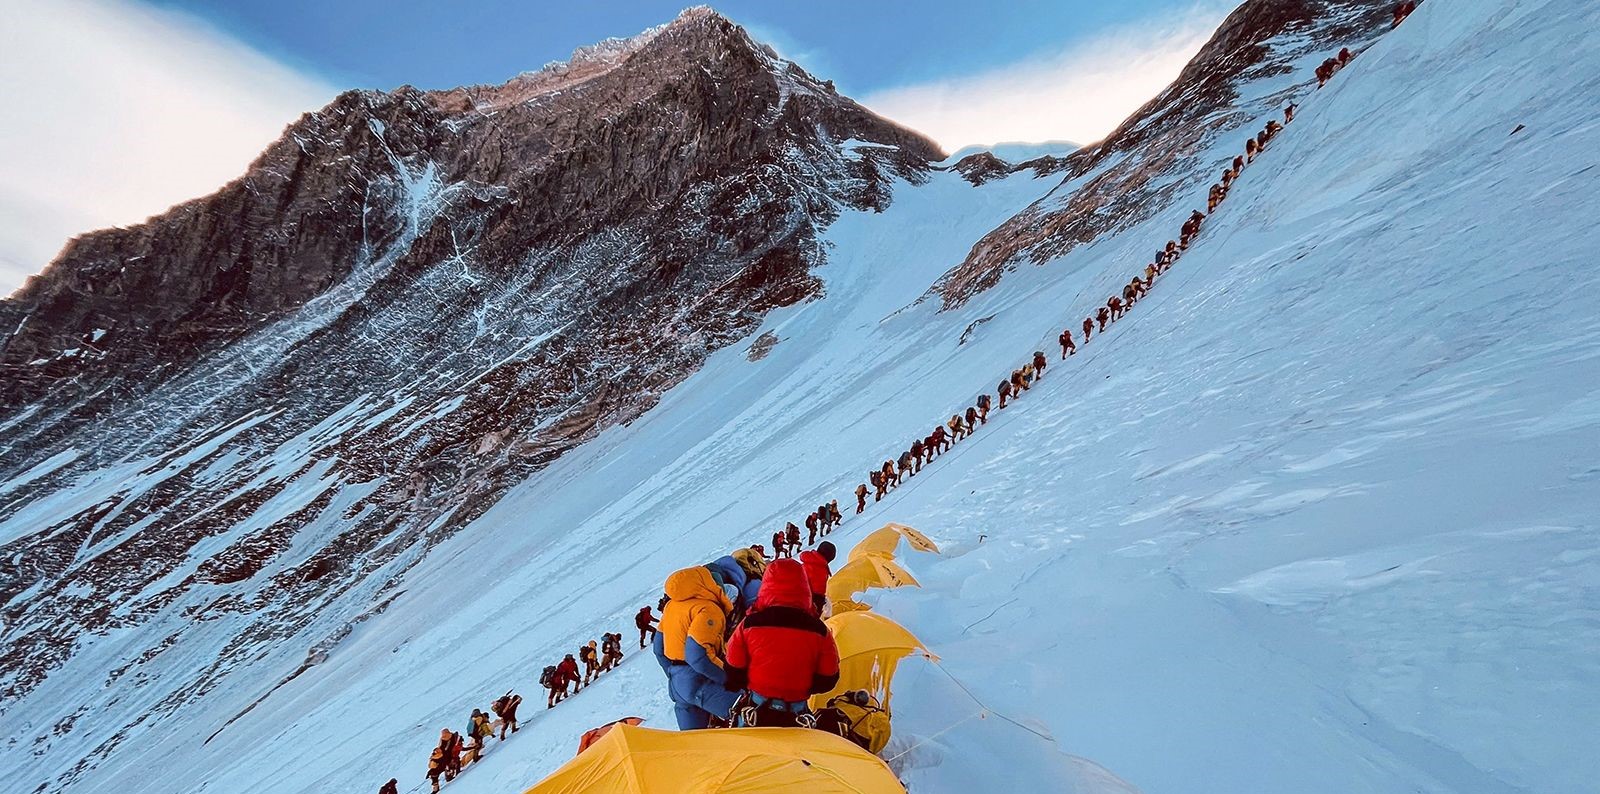
During climbing season (spring):
- Site fills with expedition tents
- Equipment and climbers preparing for summit attempts
- Active staging area for mountain ascents
Off-season:
- Just rocks and ice
- No marker or sign
- Nothing indicates this spot's significance
Except for the Khumbu Icefall.
The Khumbu Icefall: Where Everything Changes
That icefall—a chaotic maze of shifting ice blocks, crevasses, and seracs—claims lives every climbing season. Standing at Base Camp watching the route through those blue-white towers of unstable ice transforms the place from anticlimax to profound respect.
People actually climb through that chaos. Multiple times. In darkness. While suffering from altitude.
Return to Gorak Shep, exhausted but accomplished. The highest point still awaits.
Day 10: Gorak Shep → Kala Patthar (5,643m) Sunrise → Pheriche/Lobuche
Trekking time: 2 hours up, 1 hour down, plus descent
Highest point: 5,643m (highest point on the Everest Base Camp trek)
Difficulty: Extremely challenging
Pre-Dawn Ascent
Most trekkers wake around 4 AM and climb in darkness using headlamps. The ascent from Gorak Shep gains nearly 500 vertical meters in roughly two hours.
What makes Kala Patthar so difficult:
- Every step feels like three
- The altitude punishes every movement
- People stop frequently, gasping for air
- Some turn back, unable to continue
- No technical climbing—just extreme altitude effects
Why Sunrise Matters
Reaching the summit before sunrise matters. The mountain reveals itself slowly as light spreads across the Himalayas.
The moment everything makes sense:
Everest emerges from darkness—the black pyramid of rock and ice rising 3,400 meters above. Nuptse and Lhotse flank it. Pumori rises behind Gorak Shep. The Khumbu Glacier spreads below like a frozen river.
For ten minutes, nothing exists except mountains and light and the sound of labored breathing.
This is why people trek to Everest Base Camp. Not for Base Camp itself. For moments like this, when landscape overwhelms comprehension.
Descent to Lower Elevation
After Kala Patthar, descend to Pheriche (4,371m) or return to Lobuche. Sleeping at a lower elevation after reaching maximum altitude helps recovery.
The air already feels thicker. Bodies begin recovering.
Day 11: Pheriche/Lobuche to Tengboche to Namche Bazaar (7–8 Hours)
- Trekking Time: 7–8 hours
- Distance: ~20 km (12.5 miles)
- Descent: Start: ~4,240m → End: 3,440m (Net loss: ~800m / 2,625 ft)
- Difficulty: Moderate to Challenging.
Today’s trek is one of the longest but also one of the most rewarding as you begin your descent through stunning alpine landscapes. After an early breakfast in Pheriche or Lobuche, you gradually descend along the Khumbu Valley, enjoying views of Ama Dablam, Lhotse, and Everest as they appear from new angles.
The trail leads through Dingboche and Pangboche, passing mani walls and Sherpa settlements before entering the spiritual hub of the region—Tengboche Monastery. This is the perfect spot for rest, photos, and a chance to witness the peaceful atmosphere of the monastery with Everest towering behind it.
From Tengboche, the trail drops steeply to Phungi Tenga, crosses a suspension bridge, and then climbs through pine and rhododendron forests until you re-enter the bustling town of Namche Bazaar. Hot showers, bakeries, and comfortable lodges welcome you back to a lower altitude.
Day 12: Namche Bazaar to Phakding (5–6 Hours)
- Trekking Time: 5–6 hours
- Distance: ~15 km (9.5 miles)
- Descent: Start: 3,440m → End: 2,610m (Net loss: ~830m / 2,720 ft)
- Difficulty: Easy to Moderate.
After a warm breakfast in Namche Bazaar, you begin your steady descent toward lower altitudes. The trail follows the familiar path back through pine forests, prayer flags, mani stones, and suspension bridges that cross the Dudh Koshi River.
As you trek downhill, you’ll enjoy refreshing temperatures and easier breathing compared to the high-altitude sections. The route passes through Jorsalle and Monjo, where you officially exit Sagarmatha National Park. The scenery becomes greener and livelier as you approach the low valley of Phakding.
Upon reaching Phakding, you can relax in a comfortable teahouse, enjoy warm meals, and rest your legs before the final descent back to Lukla the next morning.
Day 13: Phakding → Lukla (2,860m)
Trekking time: 3–4 hours
Difficulty: Easy
The final day of trekking. Return to Lukla for an overnight before the flight out.
This is when bodies realize what they've accomplished. Two weeks of constant walking. Sleeping at extreme altitudes. Pushing through discomfort and thin air.
Lodges in Lukla serve celebratory meals. Beer tastes better than it should. Stories get exchanged with other trekkers finishing their journeys.

Day 14: Fly Lukla → Kathmandu
Flight duration: 35 minutes (weather dependent)
The return flight depends entirely on the weather. Flights are canceled regularly due to wind, clouds, or poor visibility.
Important considerations:
- Build 2–3 buffer days into itineraries
- Getting stuck in Lukla for extra days is common
- Alternative: multiple-day drive on rough roads back to Kathmandu
- Most trekkers gladly wait for flights rather than endure the drive
Returning to Kathmandu brings reverse culture shock. Traffic noise. Crowds. Pollution. The mountains haunt already.
Optional Variations on Classic Route
Helicopter Return Option
Duration: Reduces trek to 10 days total
Instead of walking back down from Gorak Shep/Base Camp, a helicopter pickup flies directly to Kathmandu or Lukla.
Cost: $500–$700 per person for shared flights
Advantages:
- Saves 4 days of trekking time
- Spares exhausted knees
- Spectacular aerial views of the Himalayas
Disadvantages:
- Misses gradual re-acclimatization
- Eliminates a different perspective on descent
- More expensive than walking
Skipping Acclimatization Days
For experienced high-altitude trekkers only
Some physically fit trekkers with previous altitude experience skip the designated rest days in Namche and Dingboche, reducing the trek to 11–12 days.
Serious risks are involved:
- Dramatically increased altitude sickness probability
- Higher evacuation rates
- Potential for life-threatening conditions (HACE, HAPE)
- Lower success rate reaching Base Camp
This approach is not recommended. Altitude doesn't care about fitness levels.
Alternative Routes to Everest Base Camp
The Best Route to Everest Base Camp Depends on You. The classic Lukla route works for most trekkers. But alternatives appeal to those with limited time, fear of the Lukla flight, desire for different perspectives, or simply wanting to experience the crowds miss.
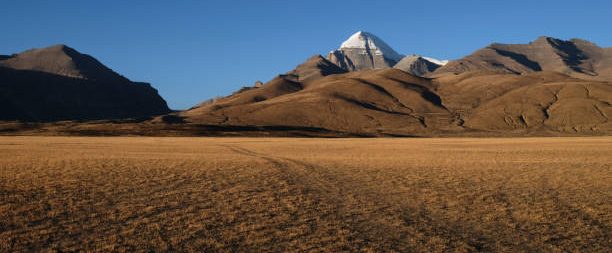
Trekkers interested in exploring a different side of Everest may consider the Everest Base Camp from Tibet route, offering breathtaking Himalayan views and a unique Tibetan cultural experience.
The Jiri Route: The Original Historical Path
- Duration: 20–21 days total
- Starting elevation: 1,905m
- Difficulty: Challenging (more total elevation gain)
- Best for: Trekkers with extra time wanting traditional experiences
Overview: Following Hillary and Tenzing
The Jiri to Everest Base Camp Route is the legendary path first used by Sir Edmund Hillary and Tenzing Norgay during their 1953 Everest expedition. Before the Lukla Airport existed, all climbers and sherpas walked from the middle hills near Kathmandu to reach the Khumbu region.
This overland trail adds about one extra week compared to flying to Lukla, but it offers something the flight cannot:
- Gradual acclimatization,
- Authentic village life,
- A smooth cultural transition from the Hindu lowlands to the Buddhist highlands, and
- A chance to experience rural Nepal untouched by mass tourism.
For trekkers seeking a traditional, deeply immersive, and historic approach, the Jiri Route to Everest Base Camp is one of the most meaningful journeys you can take.
Getting to Jiri
Transportation: 6–8 hour drive from Kathmandu to Jiri
Starting point: Jiri (1,905m) or sometimes Shivalaya
The drive takes you through terraced fields, river valleys, and rural settlements. Roads get progressively rougher as you move away from Kathmandu, but the mountain views become increasingly impressive.
This marks the true beginning of the classic Everest Base Camp trek via Jiri.
Jiri to Everest Base Camp – Day-by-Day Overview
Days 1–7: Jiri to Namche Bazaar
The path climbs over multiple ridges in an exhausting pattern:
- Up to 3,000 meters
- Down to 1,500 meters
- Up again
Key villages along the route:
- Day 1: Jiri → Mali/Shivalaya (2,080m) – 5 hours
- Day 2: Mali → Bhandar (2,190m) – 6 hours
- Day 3: Bhandar → Sete (2,575m) – 6–7 hours
- Day 4: Sete → Junbesi (2,700m) – 7 hours
- Day 5: Junbesi → Nunthala (2,220m) – 5 hours
- Day 6: Nunthala → Kharikhola (2,020m) – 6 hours
- Day 7: Kharikhola → Namche Bazaar (3,440m) – 8 hours
- Days 8–21: Follow the standard Lukla route from Namche onward
What Makes the Jiri Route Special
Cultural immersion:
- Pass through mixed communities where Buddhism gradually overtakes Hinduism
- Villages less affected by trekking tourism
- Traditional agriculture and daily life are visible
- Local interactions are more authentic
Natural diversity:
- Warmer, denser forests than higher elevations
- Rhododendron blooms spectacularly in spring
- Rich bird life and biodiversity
- This is Nepal that most trekkers flying to Lukla never see
Gradual acclimatization:
- Body adjusts slowly over a full week
- Lower altitude sickness rates
- Better success reaching Base Camp
Junbesi highlight:
- Beautiful monastery worth visiting
- Traditional Sherpa village
- A rest day is often inserted here
Disadvantages
- Extra week required
- More total elevation gain (all those ups and downs)
- Basic accommodations in lower villages
- Eventually converges on the same crowded trail at Namche
- Longer commitment if weather delays return flights
For those who prefer comfort without compromising adventure, the Everest Base Camp Luxury Lodge Trek provides well-appointed lodges along the route, ensuring warm beds and hot meals after a long day of trekking.
Phaplu Route – The Middle Ground
Duration: 16–18 days total
Starting elevation: 2,470m
Difficulty: Moderate
Best for: Those wanting gentler altitude gain without adding a full week
Overview
Phaplu splits the difference between Lukla's rapid altitude gain and Jiri's week-long approach. Accessible by small aircraft from Kathmandu, this route offers authentic Sherpa village experiences with more reasonable timeframes.
Access and Route
Flight: Kathmandu → Phaplu (2,470m)
Trek duration: 4 days to reach Namche Bazaar
Route highlights:
- Day 1: Phaplu → Ringmo/Chiwong (3,000m) – 5 hours
- Day 2: Ringmo → Taksindu (2,960m) – 6 hours
- Day 3: Taksindu → Nunthala (2,220m) – 5 hours
- Day 4: Nunthala → Namche Bazaar (3,440m) – 7–8 hours
Advantages
- Gentler altitude gain than Lukla's immediate jump to 2,860m
- Chiwong Monastery – a beautiful gompa less visited by tourists
- Authentic Sherpa villages with traditional architecture and culture
- Fewer trekkers on this route section
- Better acclimatization than flying to Lukla
- More reliable flights than Lukla (fewer weather cancellations)
Why Choose Phaplu?
For trekkers who want cultural immersion and better acclimatization but can't add a full week for the Jiri route, Phaplu provides an optimal compromise.
Road + Trek Options
Duration: Flexible (14–16 days typical)
Starting points: Salleri, Thamdanda, or other roadhead towns
Difficulty: Moderate
Best for: Budget-conscious trekkers, those avoiding flights entirely
Overview
Nepal's road network constantly expands into formerly remote areas. Multiple roadheads now provide access to mid-trail joining points.
Common Road Approach Routes
Option 1: Kathmandu → Salleri (by jeep)
- Drive time: 10–12 hours on rough roads
- Starting elevation: 2,390m
- Trek to Namche: 3–4 days
Option 2: Kathmandu → Thamdanda (by bus/jeep)
- Drive time: 12–14 hours
- Joins the classic route near the Lukla area
Advantages
- Budget-friendly: No flight costs
- Flexible timing: Not weather-dependent
- Fewer altitude issues than the immediate Lukla flight
- Road trip perspective on Nepal's developing infrastructure
Disadvantages
- Very long, rough drives (10–14 hours)
- Road conditions deteriorate during the monsoon
- Less romantic than traditional approaches
- Still join the crowded main trail eventually
Side Treks & Pass Crossings
For trekkers wanting more challenge and different landscapes beyond the standard Base Camp route, several options add days and altitude challenges
Gokyo Lakes Detour
Additional days: 3–5 days
Highest point: Gokyo Ri (5,357m)
Difficulty: Similar to the main route
Best for: Those wanting turquoise alpine lakes and different Everest views
Route Overview
Instead of going directly from Namche to Tengboche, branch west toward Gokyo Valley:
Itinerary modification:
- Namche → Dole → Machhermo → Gokyo
- Climb Gokyo Ri for sunrise views
- Either return the same way or cross Cho La Pass (5,420m) to join the main route at Lobuche
What Makes Gokyo Special
The Gokyo Lakes:
- A series of turquoise glacial lakes
- Stunning contrast against white peaks
- Less crowded than the main EBC route
- Sacred to Buddhists and Hindus
Gokyo Ri summit:
- Alternative viewpoint to Kala Patthar
- Sees four 8,000m peaks: Everest, Lhotse, Makalu, Cho Oyu
- Arguably better views than Kala Patthar
- Slightly lower altitude (5,357m vs 5,643m)
Cho La Pass Crossing
Elevation: 5,420m
Difficulty: Challenging, some ice/snow
Duration: 7–8 hours from Gokyo to Lobuche
For trekkers who detour to Gokyo, Cho La Pass provides a dramatic crossing to rejoin the main route. Requires some scrambling. Ice and snow, depending on the season. The Everest Base Camp Gokyo Lake via Cho La Pass Trek is ideal for trekkers seeking challenging passes, glacial lakes, and alternate panoramas of Everest beyond the main trail.

Three Pass Trek
Duration: Add 3–5 days to standard trek (17–19 days total)
Highest point: Kongma La Pass (5,535m)
Difficulty: Very challenging
Best for: Experienced trekkers seeking the ultimate Khumbu circuit
Overview: The Complete Khumbu Experience
The Three Pass Trek crosses all three major passes in the Everest region, creating a comprehensive circuit that visits Gokyo Lakes and Everest Base Camp while experiencing extreme altitudes and incredible scenery that few trekkers witness. The Three Passes are:
1. Renjo La Pass (5,360m)
- Connects the Namche/Thame area to the Gokyo Valley
- Stunning panoramic views
- Less technical than other passes
2. Cho La Pass (5,420m)
- Connects Gokyo to Lobuche
- Most technical of the three passes
- Ice and snow sections require care
3. Kongma La Pass (5,535m)
- Connects Lobuche/Chhukung to the main valley
- The highest of the three passes
- Long, exhausting day
Modified Itinerary
The route typically follows this pattern:
- Lukla → Namche (standard)
- Namche → Thame → Renjo La → Gokyo (detour)
- Gokyo → Cho La → Lobuche (pass crossing)
- Lobuche → Base Camp → Gorak Shep → Kala Patthar (standard)
- Gorak Shep → Chhukung → Kongma La → Namche (pass crossing)
Requirements and Warnings
Physical demands:
- Excellent fitness essential
- Multiple days above 5,000m
- Long trekking days (8–10 hours)
- Steep ascents and descents
Technical considerations:
- Some passes require crampons/ice axes (season dependent)
- Guide strongly recommended
- Weather window crucial
- Easy to get trapped by storms
Rewards:
- Most comprehensive Khumbu experience
- Dramatically fewer trekkers
- Sense of real mountaineering adventure
- Views that standard trekkers never see
Peak Climbing Options
For trekkers wanting an actual summit experience beyond trekking peaks, two accessible options exist near Everest Base Camp.
Island Peak (Imja Tse) – 6,189m
Additional days: 3–4 days post-EBC
Difficulty: Moderate mountaineering (beginner-friendly)
Technical requirements: Basic crampon/ice axe skills, rope work
Best for: First-time peak climbers wanting a 6,000m summit
Overview
Island Peak is Nepal's most popular trekking peak. The name comes from its appearance, rising like an island from a sea of ice when viewed from Dingboche.
Route:
- Branch from the main trail at Dingboche → Chhukung
- Chhukung → Island Peak Base Camp (5,200m)
- Base Camp → High Camp (5,600m)
- High Camp → Summit (6,189m) → return to Chhukung
What's Required
Technical skills needed:
- Using crampons on steep ice
- Fixed rope ascending
- Basic ice axe technique
- Roped glacier travel
Typical summit day:
- Start at midnight or 1 AM
- 6–8 hours to summit
- Steep snow/ice headwall (40–45 degrees)
- Incredible sunrise views if timing works
- Return same day to High Camp or Base Camp
Why Climb Island Peak?
- Accessible technical introduction to Himalayan mountaineering
- Actual 6,000m+ summit experience
- Views of Lhotse, Nuptse, Ama Dablam, Makalu
- Adds meaningful challenge to standard trek
- Often combined with the Three Pass Trek
Lobuche Peak – 6,119m (East Peak)
Additional days: 2–3 days from Lobuche
Difficulty: Moderate to challenging
Technical requirements: Similar to Island Peak
Best for: Those wanting to summit near Base Camp
Overview
Lobuche Peak sits directly on the route to Everest Base Camp, making it a convenient addition. Two summits exist: East (6,119m, more popular) and West (6,145m, much more technical).
Route:
- Lobuche village → Lobuche Base Camp (4,950m)
- Base Camp → High Camp (5,400m)
- High Camp → Summit (6,119m) → return
Technical Considerations
- Steeper rock scrambling sections
- More exposed ridges
- Less established route
- Requires a good head for heights
Summit day:
- Similar alpine start (midnight-1 AM)
- 7–9 hours round trip
- Rocky ridge followed by snow slopes
- Technical rock sections near the summit
- Spectacular views of Everest's Khumbu Face
Why Choose Lobuche?
- Convenient location on the standard route
- Less crowded than Island Peak
- More challenging for experienced climbers
- Direct views of Everest's climbing route
- Can combine with EBC visit same trip
Peak Climbing Logistics
- Permit costs: $250–$400, depending on peak and season
- Guide requirements: Mandatory for peak climbs
- Equipment: Rental available in Kathmandu or Namche
- Training: Most guide companies provide basic instruction at base camp
Important consideration: Peak climbing adds significant cost ($1,500–$3,000) and risk. Proper acclimatization becomes even more critical. Weather windows must align. Not all trekkers attempting these peaks summit successfully.
Helicopter Options: Fast-Track to Altitude
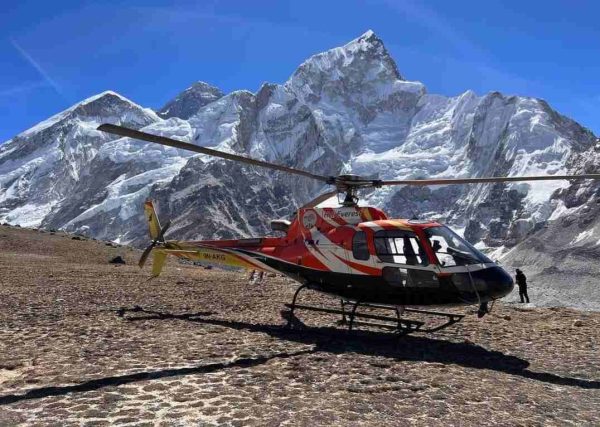
Helicopter flights to Everest Base Camp have proliferated in recent years, offering quick access to altitude for those with limited time or physical limitations.
Option 1: Direct Helicopter Tour
Duration: 3–4 hours total from Kathmandu
Cost: $1,200–$1,500 per person (shared flight)
Difficulty: Minimal physical exertion
What Happens
- Depart Kathmandu early morning
- Fly directly to Kala Patthar or near Base Camp
- Land briefly (20–30 minutes) for photos
- Fuel stop in Lukla on return
- Back in Kathmandu by lunch
The Reality of Helicopter Tours
- No acclimatization: Bodies arrive at 5,600m from sea level in 30 minutes
- Immediate altitude sickness: Headaches, nausea, dizziness hit within minutes
- Limited ground time: Most people manage 20–30 minutes before symptoms become intolerable
- Missing the journey: The trek itself is the experience, not just the destination
- Weather-dependent: Flights are canceled even more frequently than fixed-wing flights
Who it works for:
- Time-limited travelers wanting to "see" Everest
- Those physically unable to trek
- Photographers needing specific shots
- People are checking boxes rather than seeking transformation
The mountain views are identical to what trekkers see. But the experience lacks the earned quality that comes from two weeks of walking. Something essential gets lost.
Option 2: Trek Up, Helicopter Down
Duration: 10 days total
Cost: $500–$700 per person (shared flight from Gorak Shep/Pheriche)
Best for: Those wanting the trek experience but saving time on the descent
How It Works
Complete the full trek to Base Camp and Kala Patthar following the standard itinerary. After summiting Kala Patthar and reaching Base Camp, a helicopter pickup happens from Gorak Shep, Pheriche, or Lobuche, flying directly to Kathmandu or Lukla.
Advantages
Time savings:
- Eliminates 4–5 days of descent trekking
- Allows shorter vacation time (10 days vs 14)
- Spares exhausted knees and feet
- Returns to Kathmandu comfort quickly
Experience preservation:
- Maintains the full ascent experience
- Keeps gradual acclimatization benefits
- Preserves cultural immersion
- Earns the summit views through effort
Aerial perspective:
- Spectacular bird's-eye views of the Himalayas
- See the entire trekking route from above
- Photograph peaks from unique angles
- Different appreciation of the landscape scale
Disadvantages
Missing the descent experience:
- No gradual re-acclimatization
- Misses a different perspective on landscapes climbed days earlier
- Skips the final days of cultural interaction
- Loses reflection time, the descent naturally provides
Cost considerations:
- Adds $500–$700 to trek budget
- Shared flights require a minimum passengers
- Private charters cost significantly more
Weather dependency:
- Must build buffer days for delayed pickups
- Bad weather strands trekkers
- May end up walking down anyway
Who Should Consider This?
- Business travelers with limited vacation days
- Those with knee problems worried about the descent impact
- Trekkers who've completed the challenge and want an efficient return
- People are adding other Nepal destinations after EBC
Who should walk both ways:
- First-time high-altitude trekkers (descent aids acclimatization)
- Those seeking a complete traditional experience
- Budget-conscious travelers
- Anyone wanting the meditative quality of the return journey
Option 3: Helicopter to Base Camp, Trek Down
Duration: 12–14 days
Cost: $1,200+ per person
Generally not recommended
Some operators offer flying to Base Camp or a high-altitude point, then trekking down. This combines the worst aspects of both approaches:
Problems with this approach:
- Dangerous altitude exposure: No acclimatization before high altitude
- Severe altitude sickness is almost guaranteed
- Can't enjoy Base Camp due to immediate symptoms
- Descent doesn't help when starting too high
- Missing the earned experience that makes the destination meaningful
- Higher evacuation rates among trekkers using this method
Verdict: This option satisfies neither purists nor efficiency-seekers particularly well. The altitude risks remain severe while the time savings prove marginal.
Helicopter Cost Breakdown
Shared flights (4–5 passengers):
- Kathmandu → Base Camp → Kathmandu: $1,200–$1,500 per person
- Gorak Shep → Kathmandu: $500–$700 per person
- Pheriche → Kathmandu: $400–$600 per person
Private charters:
- Full helicopter rental: $3,500–$5,000
- Can be split among passengers (up to 5 people)
- Flexible timing and stops
Important notes:
- Prices fluctuate based on season and fuel costs
- Weather cancellations are common (no refunds)
- Weight limits are strictly enforced
- Must book through registered operators
The Judgment on Helicopter Access
The trekking community remains divided on helicopter accessibility:
Purist perspective:
- "Cheating"—missing the entire point of the journey
- Eliminates acclimatization, cultural immersion, and personal transformation
- Reduces sacred pilgrimage to a tourist attraction
- Disrespectful to the mountain and Sherpa culture
Pragmatic perspective:
- Different people have different abilities, timeframes, and motivations
- Accessibility allows more people to experience the Himalayas
- Economic benefits for local helicopter operators
- Not everyone can trek for two weeks
The balanced view:
What matters is understanding the trade-offs. Helicopters provide access but eliminate the transformative quality of sustained effort over days. The trek changes people. The helicopter ride provides views.
Both are valid choices. One is a journey. The other is transportation.
Acclimatization & Preparation
The Science Behind Climb High, Sleep Low
Altitude affects every human body regardless of fitness level. Understanding acclimatization principles dramatically improves success rates and safety.
Oxygen availability by elevation:
- Sea level (0m): 100% oxygen saturation
- Kathmandu (1,400m): 85% oxygen
- Namche Bazaar (3,440m): 65% oxygen
- Base Camp (5,364m): 50% oxygen
- Kala Patthar (5,643m): 48% oxygen
- Everest summit (8,849m): 33% oxygen (Death Zone)
Body's response:
- Immediate (minutes to hours):
- Increased heart rate
- Faster breathing
- Slight dizziness or lightheadedness
- Short-term (days):
- Red blood cell production increases
- Hemoglobin concentration rises
- More efficient oxygen utilization
- Full acclimatization (weeks):
- Capillary density increases
- Metabolic efficiency improves
- Psychological adjustment to altitude
Altitude Sickness Symptoms
Mild AMS (Acute Mountain Sickness):
- Headache
- Nausea
- Fatigue
- Dizziness
- Sleep disturbance
- Loss of appetite
Severe symptoms requiring immediate descent:
- HACE (High Altitude Cerebral Edema):
- Severe headache
- Confusion, disorientation
- Loss of coordination (ataxia)
- Altered consciousness
- It can be fatal within hours
- HAPE (High Altitude Pulmonary Edema):
- Severe breathlessness at rest
- Coughing (may produce pink/frothy sputum)
- Chest tightness
- Extreme fatigue
- Requires immediate evacuation
Prevention Strategies
The golden rules:
- Ascend slowly: Never gain more than 500m sleeping elevation per day above 3,000m
- Rest days: Include acclimatization days every 3–4 days of ascent
- Climb high, sleep low: Hike to higher elevations during the day, return to sleep lower
- Hydration: Drink 4–5 liters of water daily
- Listen to your body: Descend if symptoms worsen
- Never ascend with symptoms: Wait until they resolve
Diamox (Acetazolamide):
- Prescription medication aiding acclimatization
- Typical dose: 125mg twice daily
- Start 1–2 days before ascent
- Side effects: tingling fingers/toes, frequent urination, altered taste
- Not a substitute for proper acclimatization
- Consult a physician before trek
Physical Preparation Requirements
Fitness Level Needed
- Ability to walk 5–7 hours daily for consecutive days
- Comfortable hiking with a 10–12kg backpack
- No serious cardiovascular or respiratory conditions
- Moderate overall fitness
This is not a technical climb:
- No rope work or crampon skills needed (unless adding peaks)
- No rock climbing or mountaineering experience required
- Just walking, though, at high altitude on uneven terrain
Training Recommendations
3–6 months before departure:
Cardiovascular training:
- Running, cycling, and swimming 3–4 times weekly
- Build to 45–60 minute sessions
- Include interval training (mimics steep sections)
- Stair climbing with a weighted pack
Strength training:
- Focus on legs: squats, lunges, step-ups
- Core strength for pack carrying
- Upper body for trekking poles
Practice hikes:
- Weekend hikes with elevation gain
- Gradually increase pack weight
- Test all gear during training
- Build to 6–8 hour hikes with a pack
Mental preparation:
- Understand the commitment (2 weeks of discomfort)
- Accept basic conditions and cold
- Prepare for challenging bathroom situations
- Expect to be exhausted daily
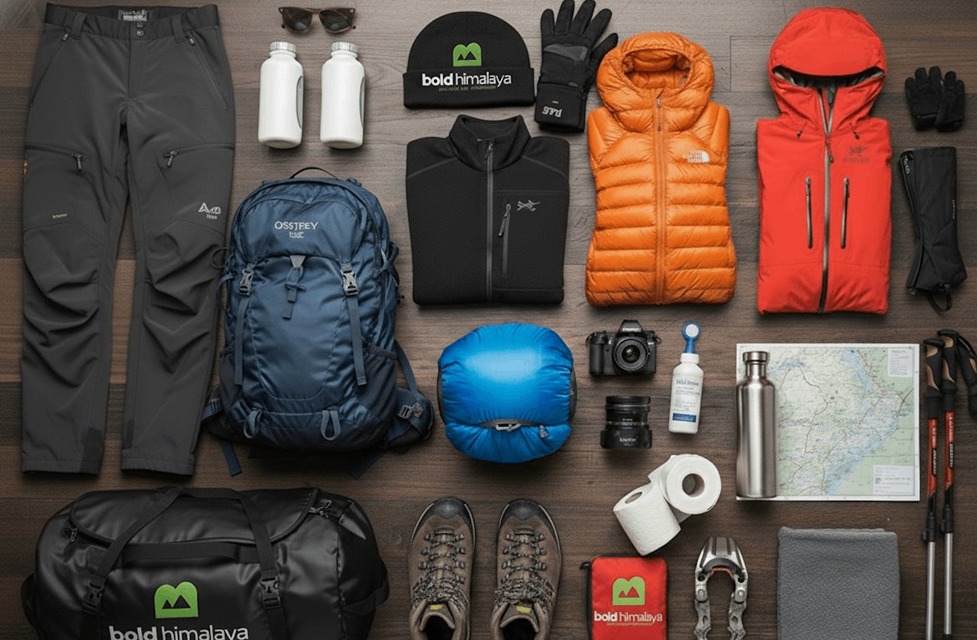
Clothing and Layers: How Many Layers for Everest Base Camp?
Temperature ranges from pleasant daytime warmth in lower elevations to minus fifteen Celsius at night near Base Camp. So proper packing is very important. The layering system allows adjustment throughout the day.
The Layering System
Base layers (2–3 sets):
- Merino wool or synthetic (never cotton)
- Top and bottom
- Bring extras—laundry doesn't happen above Namche
Mid layers (2–3 options):
- Fleece jacket or pullover
- Lightweight synthetic/down jacket
- Long-sleeve hiking shirts
Outer shell layer:
- Waterproof, breathable jacket (Gore-Tex or equivalent)
- Waterproof pants
- Wind-resistant
Insulation layer:
- Heavy down jacket (essential above 4,000m)
- Down or synthetic pants (optional but recommended for cold sleepers)
Lower body (2 sets):
- Trekking pants (zip-off legs are useful)
- Thermal leggings
- Waterproof pants
Extremities and Accessories
Head:
- Warm beanie/wool hat
- Sun hat with brim
- Buff/neck gaiter
Hands (bring backups):
- Liner gloves
- Insulated gloves
- Heavy mittens or expedition gloves (for Kala Patthar)
Feet:
- Broken-in hiking boots (ankle support essential)
- Camp shoes/sandals (for evenings in lodges)
- 4–5 pairs of wool hiking socks
- Sock liners
Eyes:
- Sunglasses (Category 4 for high altitude)
- Goggles (optional but useful in wind/snow)
The Variable Body Temperature Reality
One person stands at Gorak Shep wearing every piece of clothing brought, while another walks past in just a fleece vest. Bodies adapt differently to cold and altitude.
Bring more than seems necessary:
- Better to have options than freeze
- Temperatures drop dramatically after sunset
- Wind chill at passes feels much colder than the thermometer shows
- Sleeping at altitude in unheated rooms requires serious insulation
What Not to Bring
- Cotton anything (stays wet, provides no warmth)
- Brand new boots (blisters guaranteed)
- Excessive electronics (charging limited above Namche)
- Heavy jeans or casual clothes
- Too much—every kilogram carried matters
Mental Preparation
The physical challenge is obvious. The mental challenge surprises people.
What to Expect Mentally
Discomfort becomes normal:
- Cold nights every night
- Basic food repeatedly
- Shared bathrooms (squat toilets common)
- No showers for days
- Constant fatigue
The altitude mind:
- Thinking becomes slower
- Decision-making harder
- Emotions more volatile
- Sleep quality deteriorates
- Mild confusion common
Social dynamics:
- Living in close quarters with strangers
- Sharing dormitory-style rooms
- Dealing with others' altitude issues
- Group pace conflicts
Existential questions:
- "Why am I doing this?"—usually around Day 5
- "Can I actually make it?"—repeatedly above Dingboche
- "Is this worth it?"—answered definitively at Kala Patthar sunrise
Coping Strategies
Accept the discomfort:
- It's temporary (just two weeks)
- Everyone feels it
- Complaining doesn't help
- Focus on the privilege of being there
Break it into segments:
- Don't think about the full trek
- Focus on reaching the next village
- One meal to the next meal
- One day at a time
Find your rhythm:
- Slow, steady pace (pole-pole in Swahili, borrowed by trekkers)
- Breathing patterns synchronized with steps
- Trekking poles help establish rhythm
Connect with purpose:
- Remember why you came
- Appreciate the cultural immersion
- Notice the small details (prayer flags, mani stones, kind Sherpas)
- This is a pilgrimage, not just hiking
Gear Essentials Checklist
Absolute necessities:
- Quality sleeping bag (rated -15°C minimum)
- Trekking poles (reduce knee strain by 25%)
- Headlamp with extra batteries
- Water purification (tablets or filter)
- First aid kit with altitude medication
- Sunscreen (SPF 50+) and lip balm
- Power bank for phone/camera charging
- Dry bags for electronics and clothes
Highly recommended:
- Book or Kindle (evenings are long)
- Playing cards (social activity in tea houses)
- Wet wipes (better than limited washing facilities)
- Earplugs (lodges get noisy)
- Small gifts from home (for Sherpa hosts)
- Trail snacks (energy bars, nuts)
- Hand sanitizer
Available for rent in Kathmandu/Namche:
- Sleeping bags
- Down jackets
- Trekking poles
- Crampons (if doing peak climbs)
Optional Tips for Experienced Trekkers
Some seasoned high-altitude trekkers modify standard itineraries based on previous acclimatization experience. This section is for experienced trekkers only; beginners should never skip recommended acclimatization.
Faster Itinerary Options (11–12 days)
Experienced trekkers with recent high-altitude exposure might:
- Skip one acclimatization day (either Namche or Dingboche)
- Combine certain trekking days (e.g., Tengboche to Lobuche in one push)
- Descend more quickly (2–3 days vs 4–5)
Requirements for a faster pace:
- Previous trek above 5,000m within the past 6 months
- Excellent fitness level
- Known good altitude response
- Willingness to descend immediately if symptoms appear
- Understanding that success rates drop significantly
Still maintain:
- Gradual ascent principles above Namche
- The 2 PM rule
- Adequate hydration
- Medication backup (Diamox)
Warning
Even experienced mountaineers get altitude sickness. Past performance doesn't guarantee future results. Altitude affects people differently on different trips.
Statistics:
- 75% of people experience some AMS symptoms on the standard itinerary
- 90% experience symptoms on accelerated schedules
- Previous successful fast ascents don't eliminate risk
The extra 2–3 days for proper acclimatization dramatically increase success rates and safety margins. Time pressure rarely justifies the increased risk.
EBC vs Other Classic Treks
Understanding how Everest Base Camp compares to other famous treks helps set realistic expectations.
Which Is Harder: Everest Base Camp or Kilimanjaro?
The question arises constantly. Both are iconic bucket-list adventures. Both reach extreme altitude. But they're fundamentally different challenges.
Kilimanjaro (5,895m):
- Higher maximum elevation (531m higher than Kala Patthar)
- Faster ascent (5–6 days typically vs 12–14 for EBC)
- Shorter total distance (70–80km vs 130km for EBC)
- Single mountain with summit push
- Camping trek (no lodges)
- Altitude hits harder due to rapid ascent
- Success rates: 60–70% reach the summit
Everest Base Camp (5,643m at Kala Patthar):
- Lower maximum elevation, but still extreme
- Gradual acclimatization (nearly two weeks)
- Longer total distance and more trekking days
- Valley trek with villages and culture
- Lodge-based (tea houses with beds and meals)
- Better acclimatization leads to fewer AMS cases
- Success rates: 85–90% reach Base Camp and Kala Patthar
Verdict:
- Kilimanjaro is higher but shorter duration
- EBC requires more sustained effort over a longer period
- Kilimanjaro has more altitude sickness due to rapid ascent
- EBC is physically harder due to distance and duration
- Kilimanjaro feels more "expedition-like" with camping
- EBC offers more cultural immersion through villages
Both are difficult. Both require preparation. Neither should be underestimated. They test different aspects of endurance and adaptation.
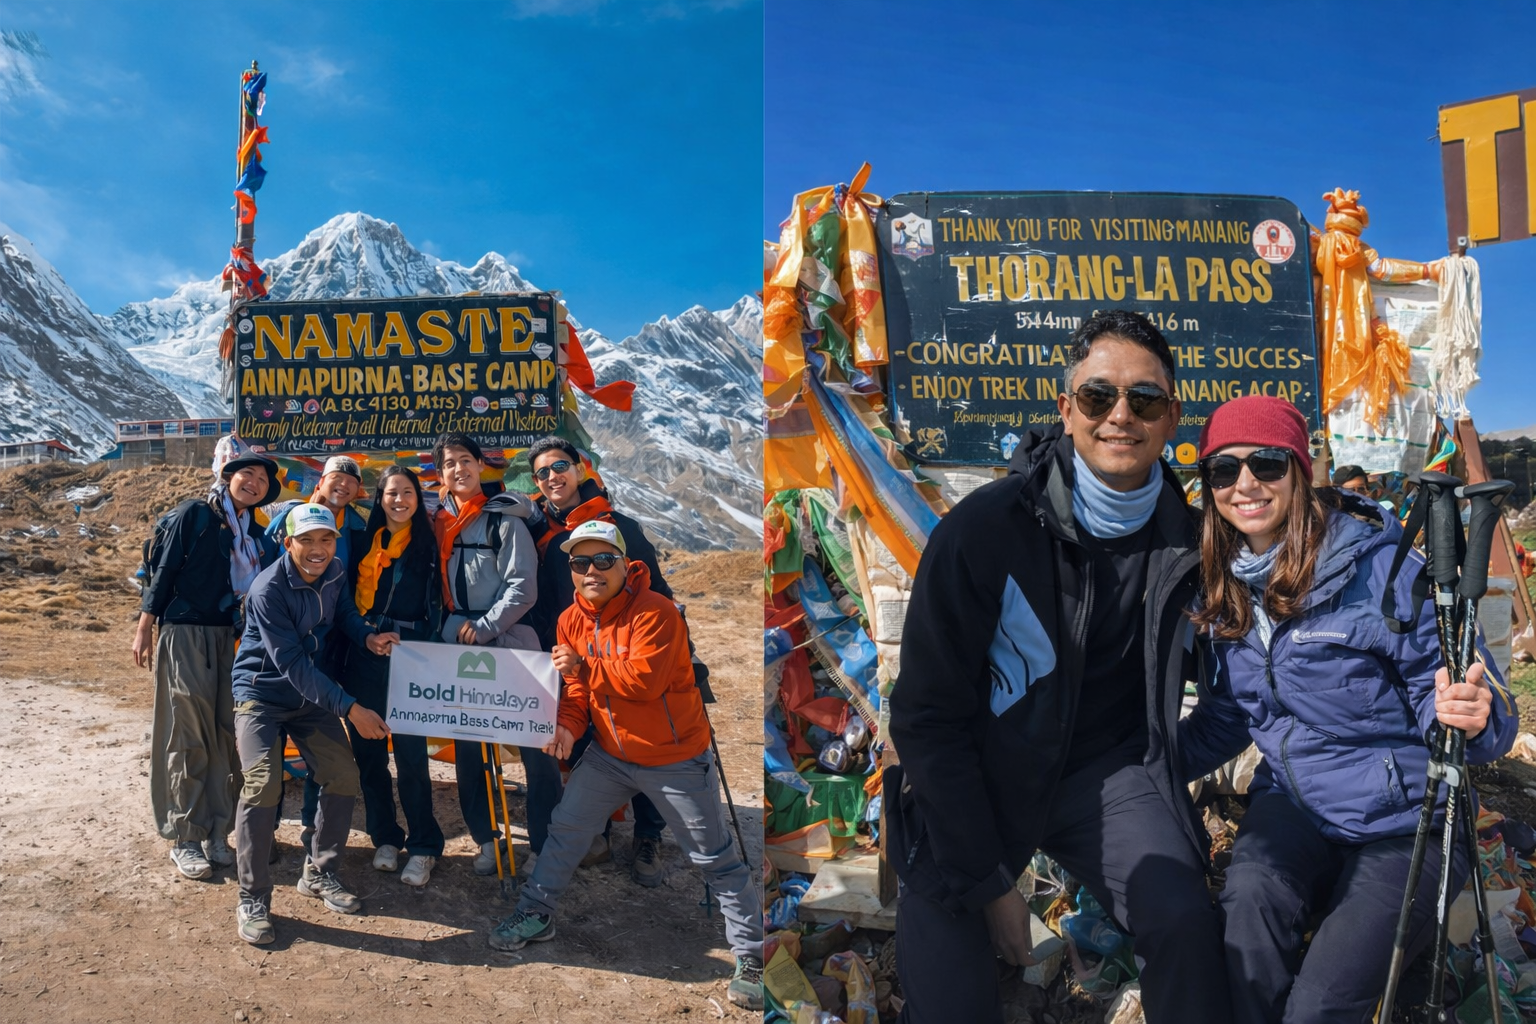
EBC vs Annapurna Base Camp
Which is the most popular trekking destination in Nepal after Mount Everest? Annapurna Base Camp (ABC) draws significant numbers—roughly 100,000+ trekkers annually compared to EBC's 50,000+.
Annapurna Base Camp (4,130m):
- Lower maximum elevation (1,500m lower than Kala Patthar)
- Shorter duration (7–10 days)
- Different landscapes (subtropical forests to alpine sanctuary)
- More biodiversity at lower elevations
- Dramatic amphitheater of peaks surrounding base camp
- Easier physically due to the lower altitude
- Better for beginner trekkers
- More varied culture (Gurung and Magar villages)
Everest Base Camp advantages:
- Prestige factor (it's Everest)
- Sherpa Buddhist culture is deeply integrated
- Higher challenge attracts achievement-oriented trekkers
- Better views from Kala Patthar
- More international recognition
Annapurna Circuit:
The full Annapurna Circuit (crossing Thorong La Pass at 5,416m) rivals EBC in popularity and challenge. Takes 15–20 days, offers incredible diversity, and has its own devoted following.
EBC vs Other Nepal Treks
Manaslu Circuit:
- Similar altitude (5,160m at Larkya La Pass)
- More remote, fewer trekkers
- Restricted area requiring special permits
- Excellent alternative to crowded EBC
Langtang Valley:
- Lower altitude (4,984m at Kyanjin Ri)
- Shorter trek (7–10 days)
- Close to Kathmandu
- Underrated and beautiful
Upper Mustang:
- Similar altitude (4,000m+ throughout)
- Desert landscape, unique Tibetan culture
- Very restricted, expensive permits
- Completely different experience
Verdict: EBC remains Nepal's most iconic trek due to Everest's global recognition, despite other regions offering equally spectacular landscapes and fewer crowds.
Best Time for the Everest Base Camp Trek
Peak season on EBC trail (October–November, March–April):
- Hundreds of trekkers on the main trail daily
- Lodges fill up quickly (booking ahead recommended)
- The trail feels like a highway in places
- Queue at Kala Patthar summit for photos
Lower season (December–February, June–August):
- Significantly fewer trekkers
- Some lodges close in winter
- Extreme cold in winter, monsoon rains in summer
- More challenging conditions, but more solitude
Comparison:
- Annapurna Circuit: Also crowded in peak season
- Manaslu: Much quieter even in peak season
- Langtang: Moderate crowds
- Gokyo Lakes: Quieter than the main EBC route
For those seeking solitude, consider alternative routes (Jiri, Gokyo variation, Three Passes) or trek in shoulder seasons.
Cultural Experience Quality
EBC strengths:
- Sherpa Buddhist culture is authentically integrated into daily life
- Tengboche Monastery and other active gompas
- Sherpa hospitality is legendary throughout Khumbu
- Living culture is not a museum display
- Prayer flags, mani stones, stupas everywhere
Trade-off:
- Tourism has changed some villages (especially Namche)
- Western amenities available (pizza, wifi, Irish pubs)
- Some cultural authenticity is diluted
More authentic cultural experiences:
- Jiri route through the lower villages
- Manaslu Circuit through traditional villages
- Upper Mustang's preserved Tibetan culture
- Remote regions are less affected by tourism
Balance: EBC offers a strong cultural experience despite the tourism impact. The Sherpa people maintain traditions while adapting to the trekking economy. Respectful visitors still access genuine cultural encounters.
Conclusion: Your Path to Everest
The Transformation Awaits
The best route to Everest Base Camp is whichever one gets chosen and completed. The classic Lukla flight works for most trekkers. The traditional Jiri walk appeals to purists. Phaplu splits the difference. Helicopter shortcuts serve specific needs. Side treks and pass crossings add challenge for experienced adventurers.
What unifies all these options: the destination matters less than the journey.
What Really Matters
Base Camp itself proves anticlimactic for most trekkers—just rocks and ice and the terrifying Khumbu Icefall. But that's not why people trek to Everest Base Camp.
They come for:
- That moment at Kala Patthar when Everest emerges from darkness at sunrise
- The earned quality of reaching an extreme altitude through sustained effort
- Walking through Sherpa villages where Buddhism lives in daily practice
- Testing personal limits and discovering resilience previously unknown
- The meditative quality of walking for two weeks through impossible landscapes
- Connecting with humanity's drive to explore beyond comfortable boundaries
The Questions That Get Answered
Why trek to Everest Base Camp?
Because some landscapes change how people understand both mountains and themselves. Because transformation requires discomfort. Because walking where most humans never go proves something essential about human capability and determination.
How many steps is Everest Base Camp?
Nobody counts. That's not the point. The number doesn't matter. What matters is each step taken despite cold, altitude, exhaustion, and doubt.
What is the highest point on the Everest Base Camp trek?
Kala Patthar at 5,643 meters. But the highest point isn't measured in elevation—it's measured in moments when landscape overwhelms comprehension and nothing exists except mountains and light and labored breathing.
Making the Choice
Choose the Lukla route if:
- Time limited to two weeks
- First high-altitude trek
- Want a tested, efficient itinerary
- Comfortable with crowds and established trails
Choose Jiri/Phaplu if:
- Have three full weeks
- Want gradual acclimatization
- Seek deeper cultural immersion
- Prefer quieter trails and traditional experience
Choose Gokyo/Three Passes if:
- Experienced at altitude
- Want a challenge beyond the standard route
- Seeking solitude and different perspectives
- Have time and fitness for extra days
Choose helicopter options if:
- Severely time-limited
- Physical limitations prevent a full trek
- Understand and accept trade-offs
- Primarily want views over the journey
Final Wisdom
Kathmandu arrival begins and ends the journey. The city's chaos bookends mountain silence. Preparation happens there—permits, gear checks, final briefings. Return brings reverse culture shock already tinged with nostalgia.
Prayer flags flutter overhead in Kathmandu too, stretching between buildings and temples. The same flags that marked every pass and summit on the trek. Wind carries prayers printed on colored cloth outward constantly. Every flutter sends blessings.
Standing in Thamel district, surrounded by gear shops and trekking agencies, plans already form for the return. Because Everest gets under the skin. The Himalayas change people.
The Truth About EBC
Two weeks of discomfort. Cold nights. Basic food. Constant walking. Altitude symptoms. No quitting midway—the only exit is helicopter evacuation or walking out.
And yet trekkers return years later still talking about the time they walked to Everest. Still scrolling through photos, trying to confirm whether those landscapes actually existed or were somehow dreamed into being.
The famous trekking route to Mount Everest Base Camp encompasses all the options described here. Classic and alternative routes. Quick flights and traditional walks. Solo pushes and guided groups. Each path tests limits and rewards perseverance. Each offers glimpses of landscapes and cultures that exist nowhere else on Earth.
Your Journey Begins
Choose your route. Book your flights. Train your body and prepare your mind. Pack the layers (three to four for torso, two for legs, and heavy down for altitude). Build in acclimatization days. Respect the 2 PM rule. Bring Diamox. Listen to your body.
Walk through Namche's amphitheater of stone buildings. Walk past Tengboche Monastery as monks chant evening prayers. Walk through Dingboche, where vegetation surrenders to rock. Walk across Lobuche's moraine. Walk to Gorak Shep and beyond to Base Camp, where the Khumbu Icefall rises like frozen chaos.
Then wake at 4 AM and walk in darkness up Kala Patthar using a headlamp light. Walk until lungs burn and every step feels like three. Walk until the highest point on the Everest Base Camp trek is reached and the mountain emerges from darkness.
Stand there watching Everest reveal itself slowly. Watch the light spread across the Himalayas. Watch Nuptse and Lhotse, and Pumori catch first rays while the Khumbu Glacier flows below like a frozen river.
For ten minutes, nothing will exist except mountains and light and breathing.
That moment—that earned, hard-won, altitude-sick, exhausted, transformed moment—is why people trek to Everest Base Camp.
Prayer flags will flutter overhead. Butter lamps will glow in Tengboche's shrine room. Mountains will stand eternal against the impossible blue sky. And somewhere between Kathmandu arrival and Kala Patthar sunrise, the transformation happens.
The one that makes people return years later, knowing they once walked to the roof of the world.
And that changes everything.
Comments (0)
Write a comment- Introduction: Multiple Paths to the Roof of the World
- Factors That Shape Your Choice
- The Classic Everest Base Camp Trek: 14-Day Lukla Itinerary
- Why Trek to Everest Base Camp?
- Day-by-Day Breakdown of the Classic EBC Trek
- Day 1: Arrival in Kathmandu (1,400m)
- Day 2: Fly to Lukla (2,860m), Trek to Phakding (2,610m)
- Day 3: Phakding → Namche Bazaar (3,440m)
- Day 4: Namche Bazaar – Acclimatization Day
- Day 5: Namche → Tengboche (3,867m)
- Day 6: Tengboche → Dingboche (4,410m)
- Day 7: Dingboche – Acclimatization Day
- Day 8: Dingboche → Lobuche (4,940m)
- Day 9: Lobuche → Gorak Shep (5,164m) → Everest Base Camp (5,364m) → Gorak Shep
- Day 10: Gorak Shep → Kala Patthar (5,643m) Sunrise → Pheriche/Lobuche
- Day 11: Pheriche/Lobuche to Tengboche to Namche Bazaar (7–8 Hours)
- Day 12: Namche Bazaar to Phakding (5–6 Hours)
- Day 13: Phakding → Lukla (2,860m)
- Day 14: Fly Lukla → Kathmandu
- Optional Variations on Classic Route
- Helicopter Return Option
- Skipping Acclimatization Days
- Alternative Routes to Everest Base Camp
- The Jiri Route: The Original Historical Path
- What Makes the Jiri Route Special
- Phaplu Route – The Middle Ground
- Why Choose Phaplu?
- Road + Trek Options
- Side Treks & Pass Crossings
- Gokyo Lakes Detour
- Three Pass Trek
- Overview: The Complete Khumbu Experience
- Modified Itinerary
- Requirements and Warnings
- Peak Climbing Options
- Island Peak (Imja Tse) – 6,189m
- Lobuche Peak – 6,119m (East Peak)
- Peak Climbing Logistics
- Helicopter Options: Fast-Track to Altitude
- Option 1: Direct Helicopter Tour
- Option 2: Trek Up, Helicopter Down
- Option 3: Helicopter to Base Camp, Trek Down
- Helicopter Cost Breakdown
- The Judgment on Helicopter Access
- Acclimatization & Preparation
- The Science Behind Climb High, Sleep Low
- Altitude Sickness Symptoms
- Physical Preparation Requirements
- Fitness Level Needed
- Training Recommendations
- Clothing and Layers: How Many Layers for Everest Base Camp?
- The Layering System
- Extremities and Accessories
- The Variable Body Temperature Reality
- Mental Preparation
- What to Expect Mentally
- Gear Essentials Checklist
- Absolute necessities:
- Highly recommended:
- Available for rent in Kathmandu/Namche:
- Optional Tips for Experienced Trekkers
- Faster Itinerary Options (11–12 days)
- Experienced trekkers with recent high-altitude exposure might:
- EBC vs Other Classic Treks
- Which Is Harder: Everest Base Camp or Kilimanjaro?
- EBC vs Annapurna Base Camp
- Annapurna Base Camp (4,130m):
- Everest Base Camp advantages:
- EBC vs Other Nepal Treks
- Manaslu Circuit:
- Langtang Valley:
- Upper Mustang:
- Best Time for the Everest Base Camp Trek
- Peak season on EBC trail (October–November, March–April):
- Lower season (December–February, June–August):
- Cultural Experience Quality
- EBC strengths:
- More authentic cultural experiences:
- Conclusion: Your Path to Everest
- The Transformation Awaits
- The Questions That Get Answered
- Why trek to Everest Base Camp?
- How many steps is Everest Base Camp?
- What is the highest point on the Everest Base Camp trek?
- Making the Choice
- Final Wisdom
- The Truth About EBC
- Your Journey Begins
Read the latest Blogs & Insights
Explore our collection of articles and insights to gain in-depth travel knowledge, expert advice, and stay updated on the latest trends and tips.
No comments yet.